I’m going to show you how to edit VideoSongs (music videos) and talking head videos. I’ve decided to combine them in the same post because my process is the same.
The plan is to show you this process in different stages. We’ll start off with the simple edits and then move on to the more complex edits as musicians finish uploading their videos to DropBox & WeTransfer.
My video editing program of choice is Screenflow because it’s simple to use. If you’re on a Mac and you don’t have screenflow you can use iMovie. If you’re on a Windows computer use Windows Movie Maker.
You could even use your DAW if it supports video.
Here are the video editing features we’ll be focusing on for our simple edit.
Cut & Splice: This operates the exact same way it would if you were cutting and slicing audio in a DAW.
Noise Reduction: There is noise reduction for video, but this is audio noise reduction. What this does is reduce the amount of background noise captured in your audio signal.
If your video editor doesn’t have this feature then use something like Audacity.
Simple Video Editing
It’s called simple video editing because we aren’t going to do much to the video. At most, we’re going to clean up a couple of goofy mistakes and get rid of the little unwanted noise. Sounds simple right?
This literally takes less than five minutes of work depending on how long the video is.
Step 1: Import Your Video Into The Editor
Hopefully, you were following the directions outlined in the last post where I told you to export all of your media into a folder. Now we’re going to take all that media and dump it into our editor.
I snagged this video just for a quick demonstration of what you can do with a video where the audio was recorded with the onboard camera. You can generally tell if it’s onboard sound because the audio and video are laced together.
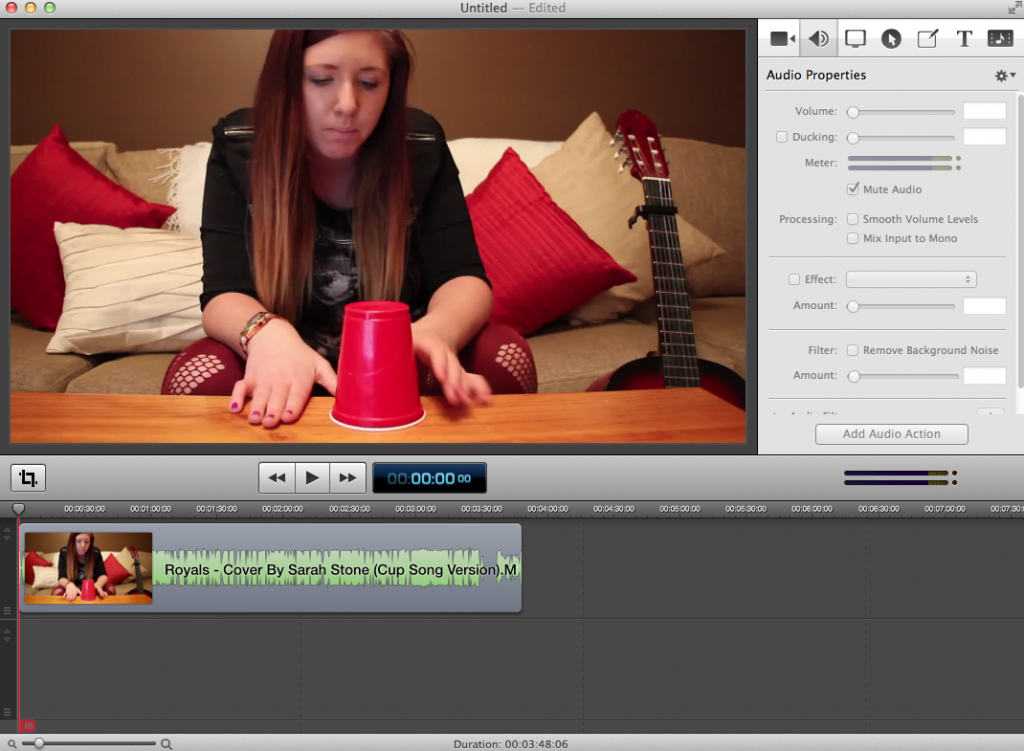
It should look like this once everything is imported.
Step 2: Scrub Through Your video song
What we’re looking for here are sections we want to keep and sections we want to delete. Use your slicing tool to isolate sections you don’t want and delete them.
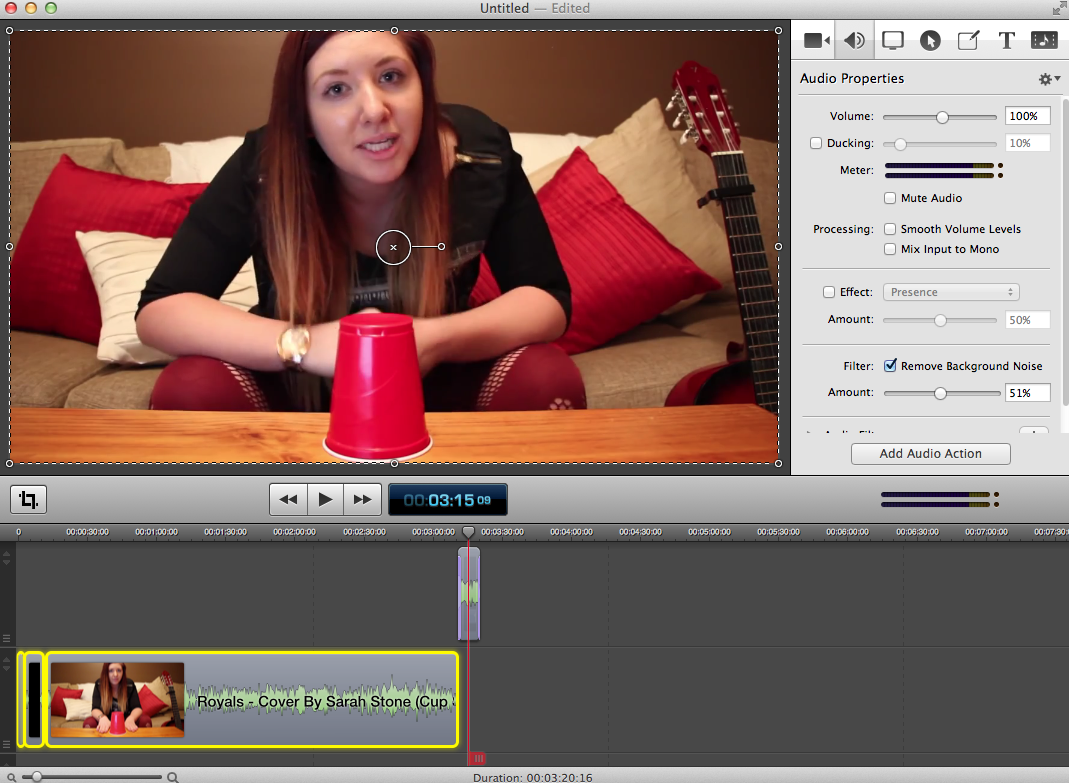
Once you’re done it should look similar to the screen capture above.
Step 3: Clean Up The Audio
In this video, it sounds like Sarah is using her camera’s stock microphone. Or she could just have a really noisy environment. Either way, I’ll shall you how to clean it up a bit.

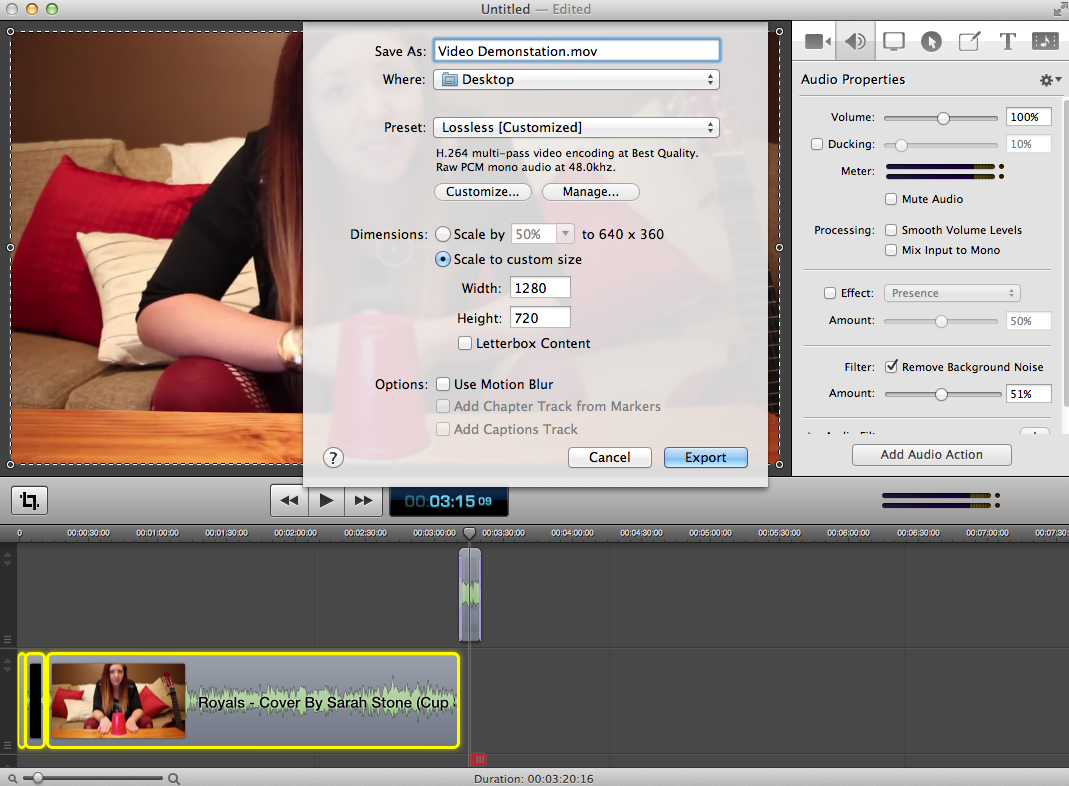
Pay attention to the right side of the capture where it says “remove background noise” you want to adjust the slider underneath to get the desired sound or good balance between noise removal and comb filtering.
Too much removal will give your sound a canny twang-like sound.
Side note: Most people won’t notice a little bit of noise especially if they aren’t listening via headphones, buds or treated environments. Something to keep in mind while you’re editing.
Step 4: Export & Upload Your Video
That’s as simple as it gets right there. If you don’t care much for fancy intros then it really doesn’t get any simpler than this. This type of edit takes about 3, maybe 5 minutes.
Tutorial Of This VideoSong Edit
httpvh://www.youtube.com/watch?v=TJ-TC0qWtuo
Using Jump Cut Transitions
httpvh://www.youtube.com/watch?v=rgwUL2pWDkM

