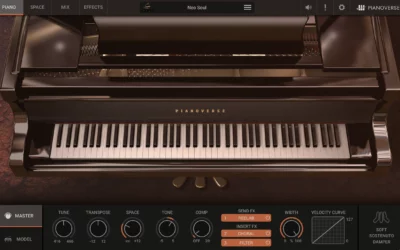
Mixing music is about adjusting, balancing levels, and blending instruments and sounds together so they can be heard clearly within your song, beat, instrumental, etc. The mixing is achieved by using various tools such as; EQ, Volume Level, Dynamic FX, Time-based FX, and various Creative FX and plugins.
The amount of fx, plugins, and options available to use can be overwhelming. It is for that reason this post will focus on how to achieve a good mix using as few effects/plugins as possible.
What Does A Good Mix Consist Of?
A good mix, like a good song, consists of combining the right sounds and instruments and delivering them in a way that keeps the listener engaged. It’s hard to present a good song without a good mix.
Let’s use cooking as an analogy. You can have all the right ingredients, but if not used correctly, you can wind up with an expensive dish of yuck! Another way to look at it is having a great business idea but not being able to articulate and or present that idea to investors.
If the mix is terrible, the song’s potential is often overlooked, and the same could be true for the creator of said song. This is not what we want.
Please, keep in mind these tips are from the perspective of a music producer who mixes his own work. With that being said, here are some mixing tips I use for delivering clear mixes to my clients: Artists, Music Gear Companies, TV and Film, and Video Games. Let’s get into it!
1. Sound Selection: Quality In Quality Out
In my professional opinion, this is where the mix starts. You, as the music producer (creator), have the ability from the jump to decide how simple or how complex your mix is going to be. The better sounds you choose, the less mixing you’ll have to do.
Pick sounds that are
- Record well: Clean, good level, no artifacts and or noise
- Full Sounding: Sound as if they can stand on their own when played
- Lush Sounding: Non-dry with a decent amount of EQ, Delay, Reverb, etc.
Avoid sounds that are iffy and have serious errors. What do I mean by serious errors?
- Hissing: white noise embedded in the recordings or samples
- Pops and Clicks: Easy to fix most of the time, but annoying to deal with
- Clipping: This could be ok depending on the recording resolution, but you shouldn’t be hearing distortion
- Nasty Resonances: These generally have undesirable overtones and clash with other sounds
Picking good quality sounds will eliminate the need to use a lot of fx and processors. It’s, for this reason, most of them, like compression, will be left out. Don’t get me wrong, compression is great, but not needed with this simple approach to mixing.
2. EQ: High Pass & Low Pass Filter – Underrated But Powerful
Every sound in your track/song has information spread across the frequency spectrum. The goal is to go through each sound and remove the unneeded frequencies without ruining the sound in the process.
High Pass Filter: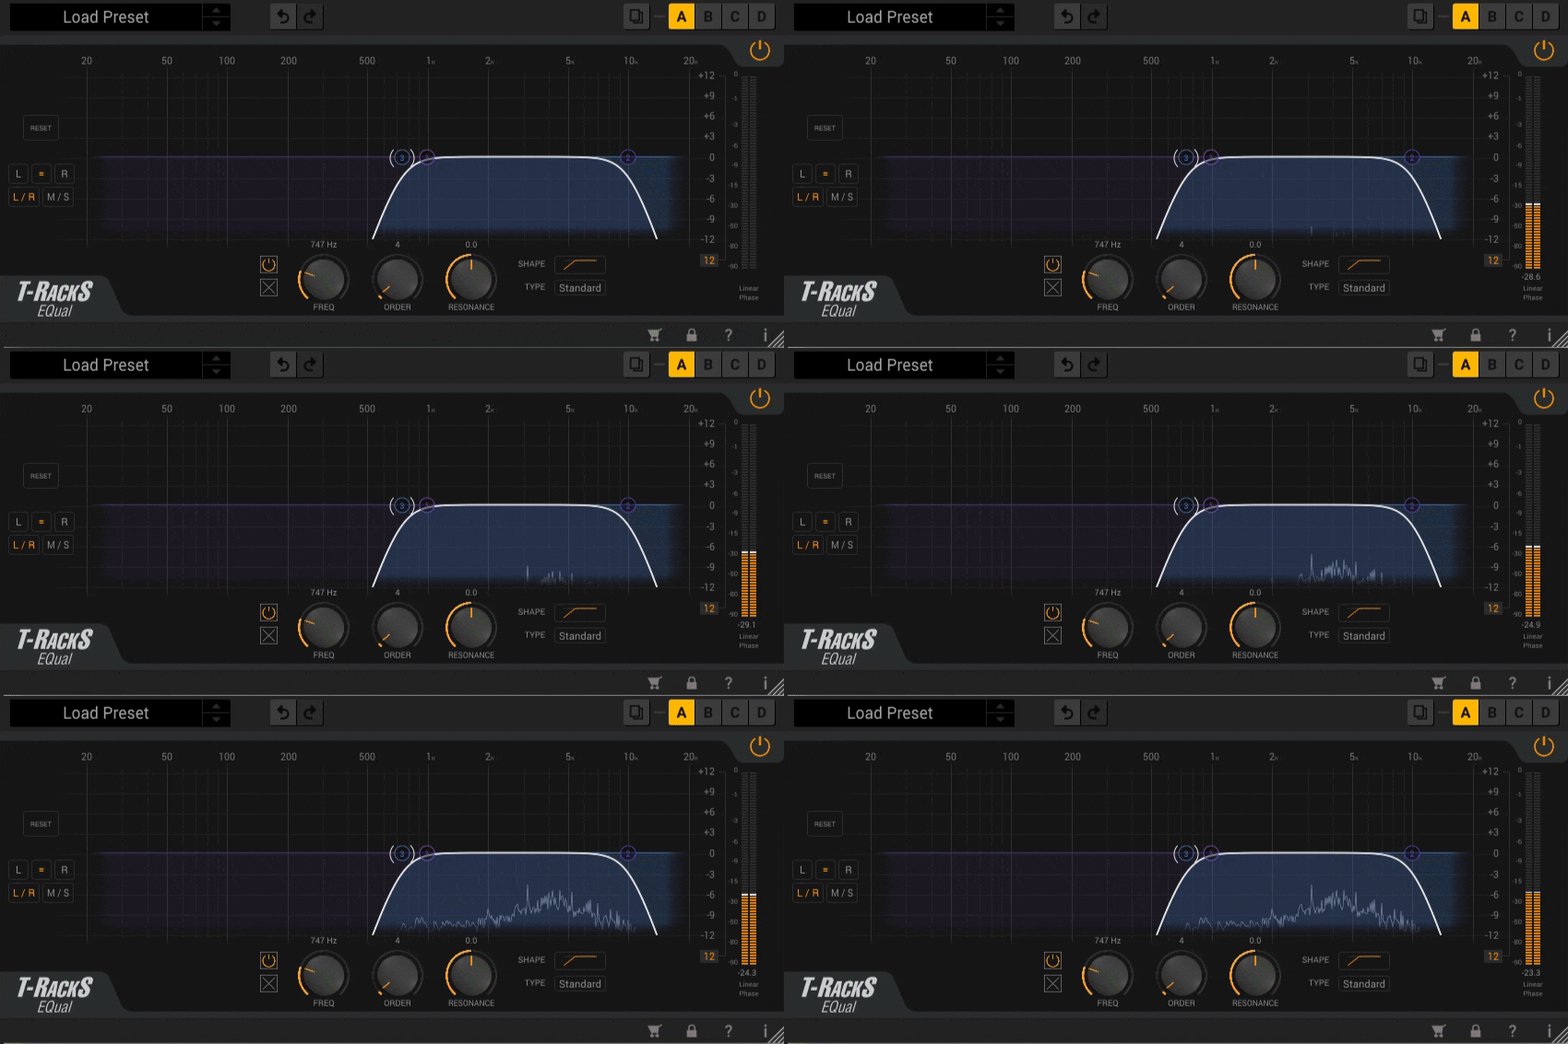
High hats don’t need low-end information the majority of the time. To avoid adding mud to your mix, take your high pass filter and cut away some of the low-end.
Low Pass Filter: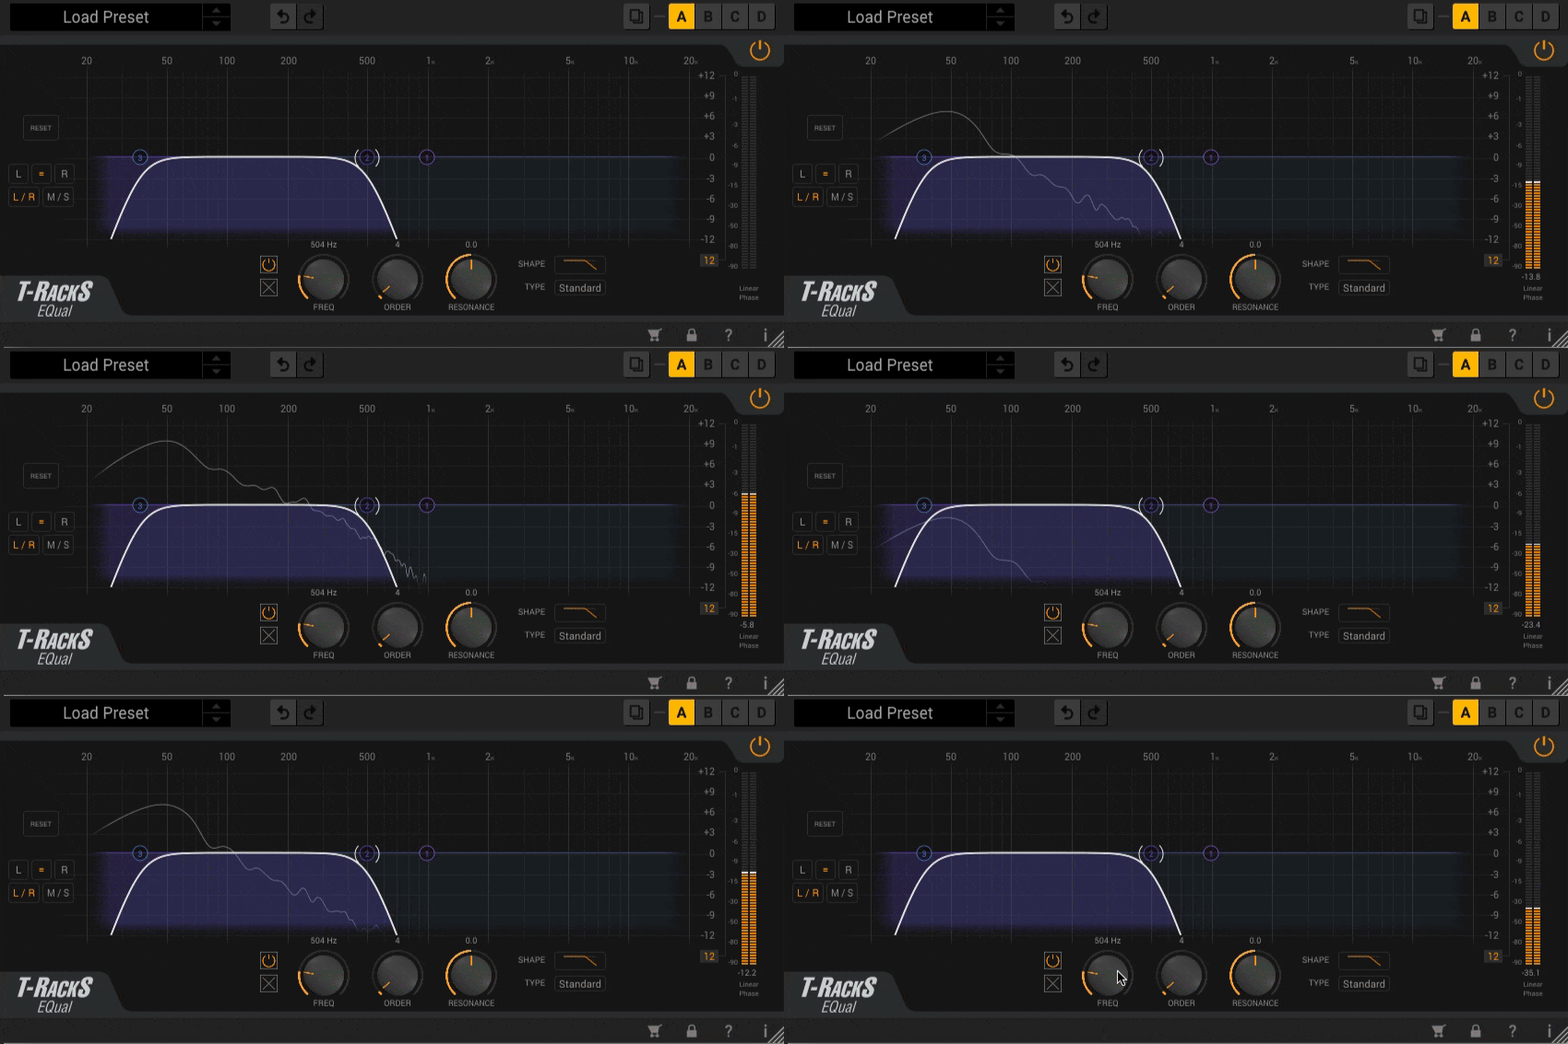
Basslines and kicks don’t need a lot of high-frequency content, so use your low pass filter to cut away some of the high-end.
You want to be careful not to cut out too much information, as this could result in a thin mix. The way to avoid cutting too much is to set your filters between 12 and 36 dB.
3. Song Arrangement
Early on, I said to make sure not to pick more than one sound to occupy each frequency range. Well, sometimes you can’t help yourself, so to remedy this or to simply make mixing easier and solidify your mix, make sure you arrange the music so that sounds that ‘could’ clash don’t play at the same time.
When sounds that have the possibility of clashing are played together, one or both of them have to give up something to coincide with one another. This is generally done with EQ or Compression. By arranging them properly, that’s less corrective work you have to do.
Why enter a traffic jam if you don’t have to?
4. Leveling Your Sounds
So you’ve picked some good sounds, you have a nice track going now, and it’s arranged. Now, it’s time to set your levels.
Listen to your song and take note of the most important sounds. Pull all your faders down to the point where you can’t hear them.
Take those important sounds and bring them up in volume (with the fader), with the most important sound being the loudest, the second most important a little lower than the loudest, and so forth. Find a good balance between the most important sounds because everything else in the track will fall behind them in terms of loudness.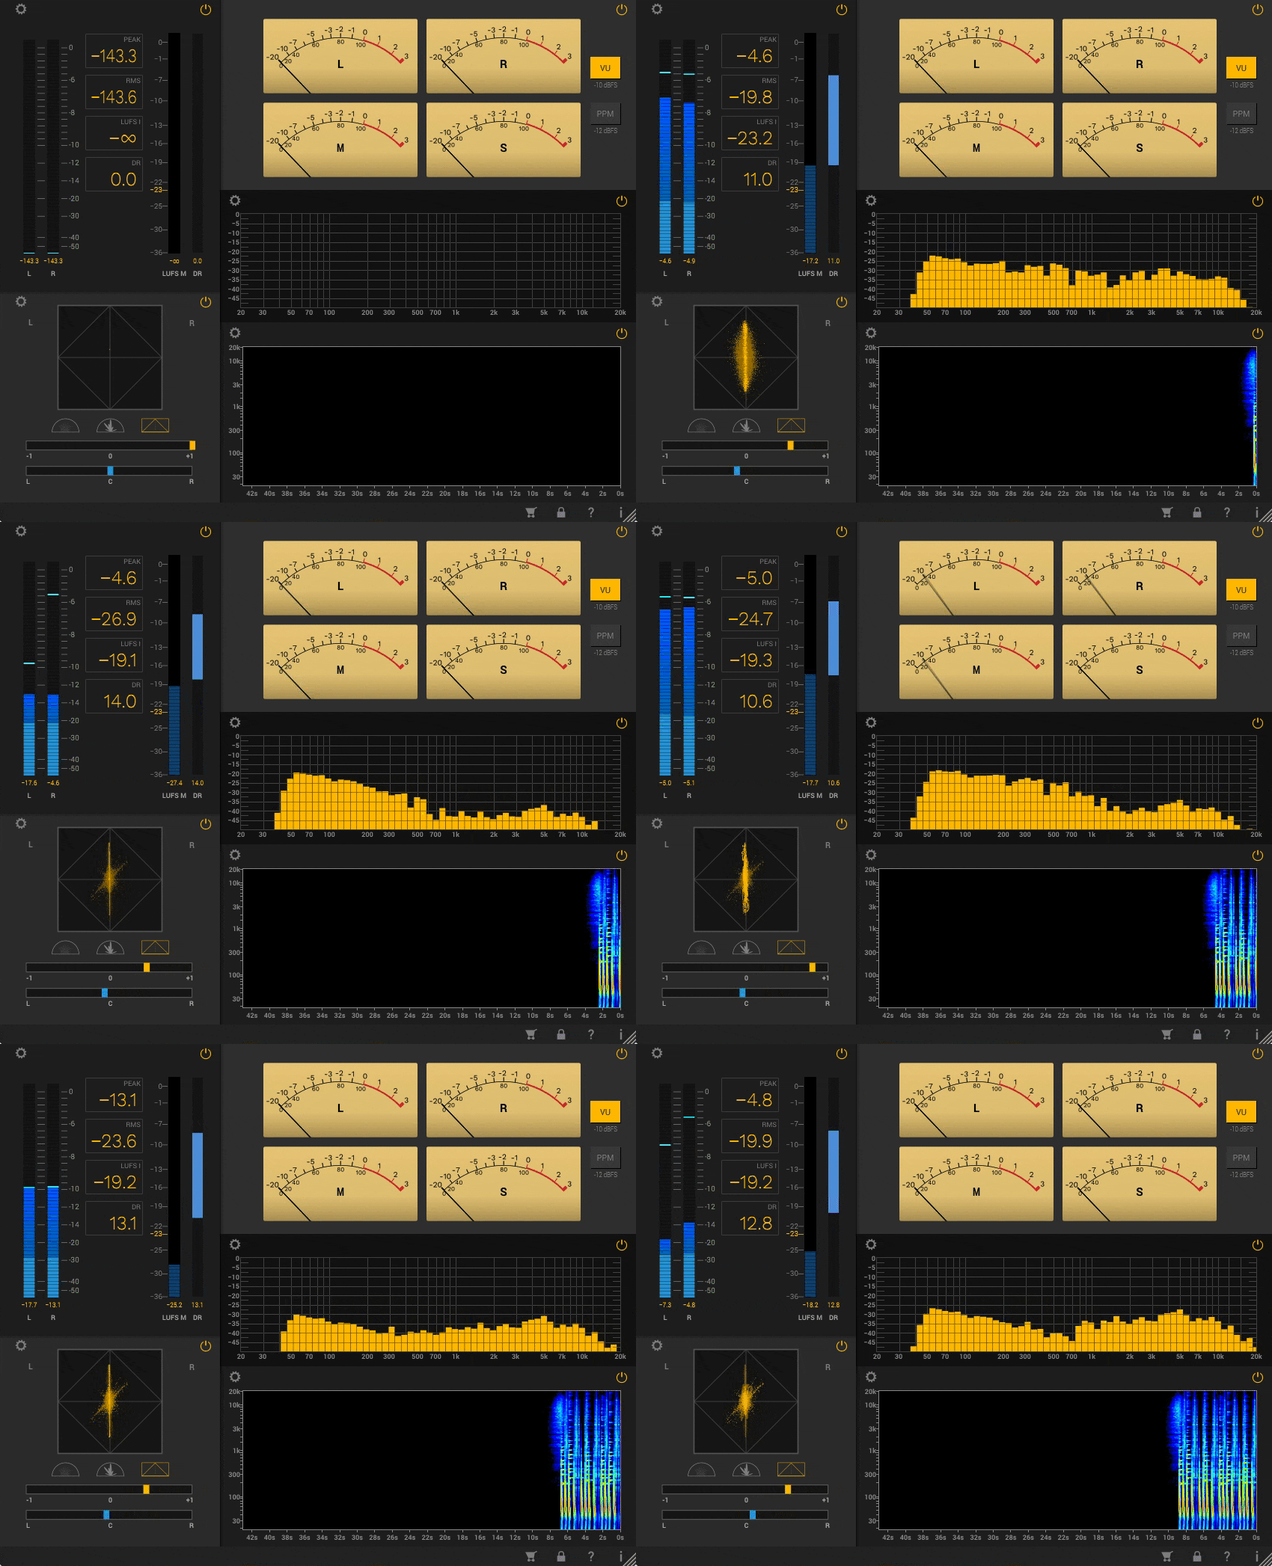
In terms of your meters, I like to make sure not to exceed the following
Peaks: no more than -3dB
RMS: I keep these between -20 and -15dB
I’m sure some of you may be wondering about LUFS. I don’t pay much attention to it until I’m at the mastering stage. Don’t worry, there will be a mastering post in the near future.
5. Stereo Imaging:
You want to give elements within your music a little separation (spread them out) and make the track sound wider and bigger. All sounds, although they sound good, don’t need to be stuck in the center. As a good rule of thumb to follow – the higher the frequencies are, the further they can be panned and spread out in the stereo field.
The lower the frequencies, the more you want those sounds to stay in the middle. How much you pan is determined by how you want your mix to sound. Some instruments might need hard pans, others 20 and 30%. Experiment and listen for what sounds best.
6. Mono Mixing Compatibility
Mono mixing is a good technique to use to make sure that all the movements and mixing decisions that you’ve made can still be heard when your track is collapsed to mono. It’s rare to find sounds these days that are 100% mono, so between your sound selection and your stereo Imaging, you’re going to have quite a bit of stereo information to deal with.
What you want to do is find a mono summing plugin, place it on the master bus, and initiate it. Some DAWs, like Reaper, have this feature built-in (no 3rd party plugin needed).
A/B your mix in stereo vs mono and listen for any sounds that disappear when put in mono. It’s normal to have sounds shift a bit, but if you notice sounds that duck down a lot in volume or vanish, this is not good, and you’ll have to revisit your sound selection or take a corrective measure like subtractive and or additive EQ.
However, I’m sure you’ve taken my advice and chosen good sounds as well as arranged the music well so that possible conflicting sounds do not play on top of one another. You did this, right? Good.
7. Subtractive and Additive EQ
Basically, cutting frequencies from one instrument and boosting frequencies in another.
Subtractive EQ: if you have two or more instruments that share certain frequencies that clash with one another, remove those frequencies from the sounds that ‘don’t need’ those frequencies. This allows the important sound to stand out where it should and the clash to be avoided.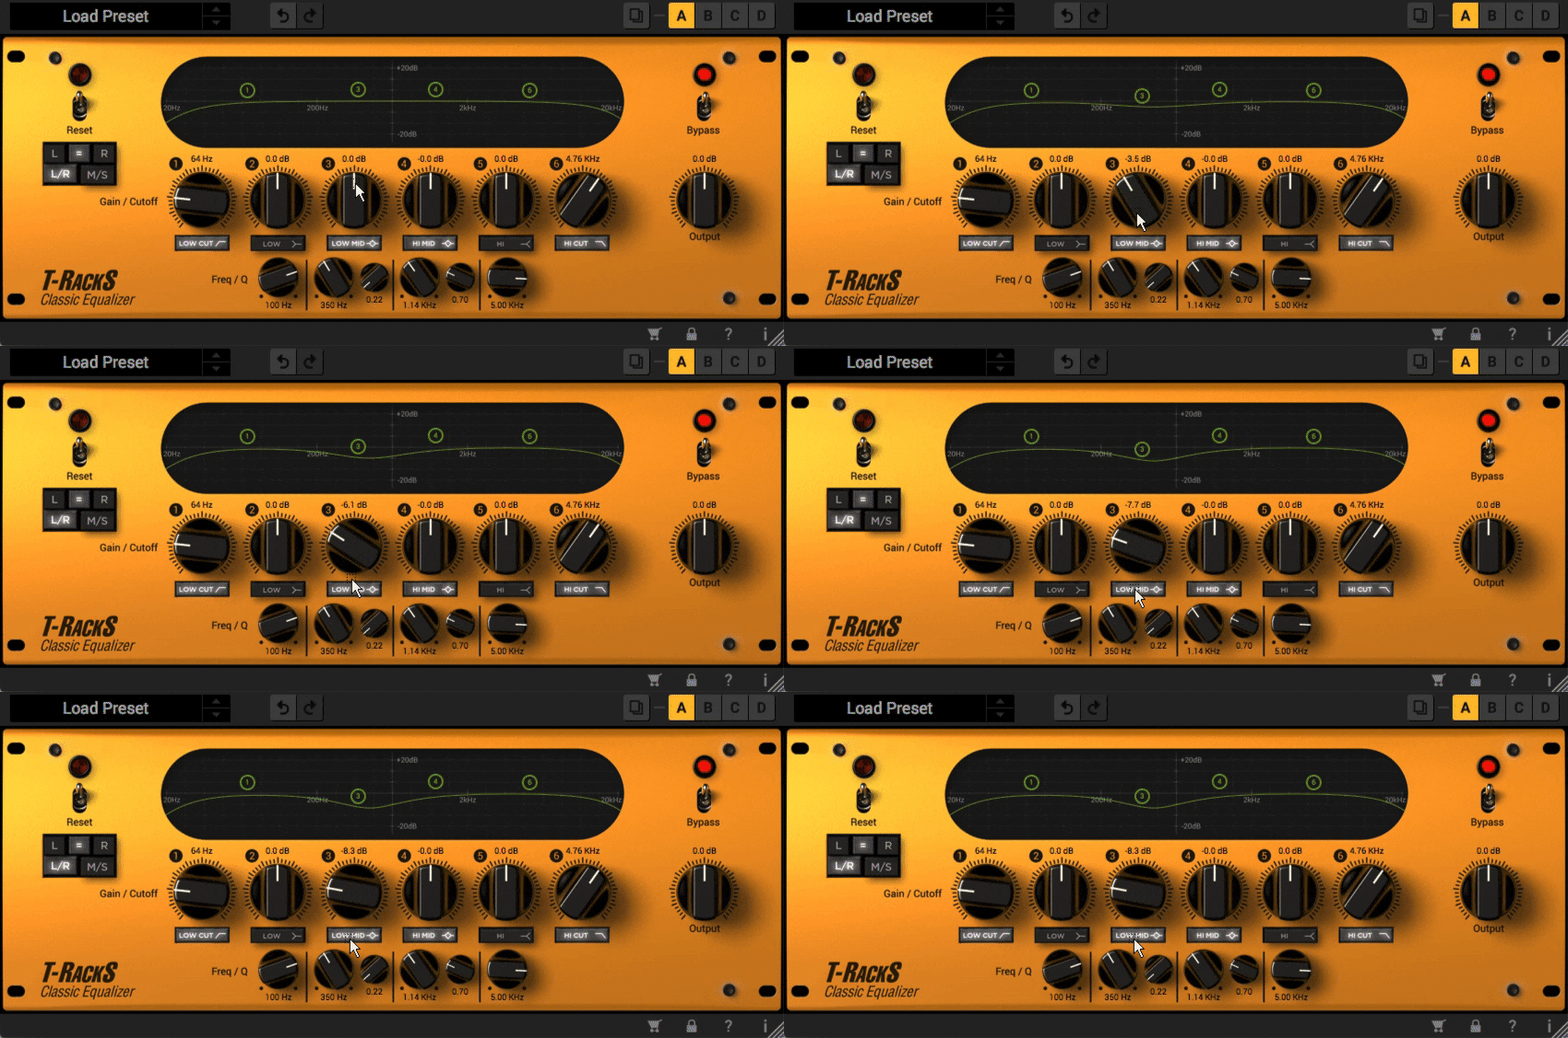
Perfect Example: Let’s say you have a synth that shares frequencies with your snare making it hard to hear. If the snare popping in that frequency range is most important, remove that frequency range (drop it down) a few dB so the snare can stand out better.
Additive EQ: Sometimes, there are no conflicting sounds in the frequency range where you want one instrument to have more presence. In this case, evaluate the sound and boost the frequencies that you need.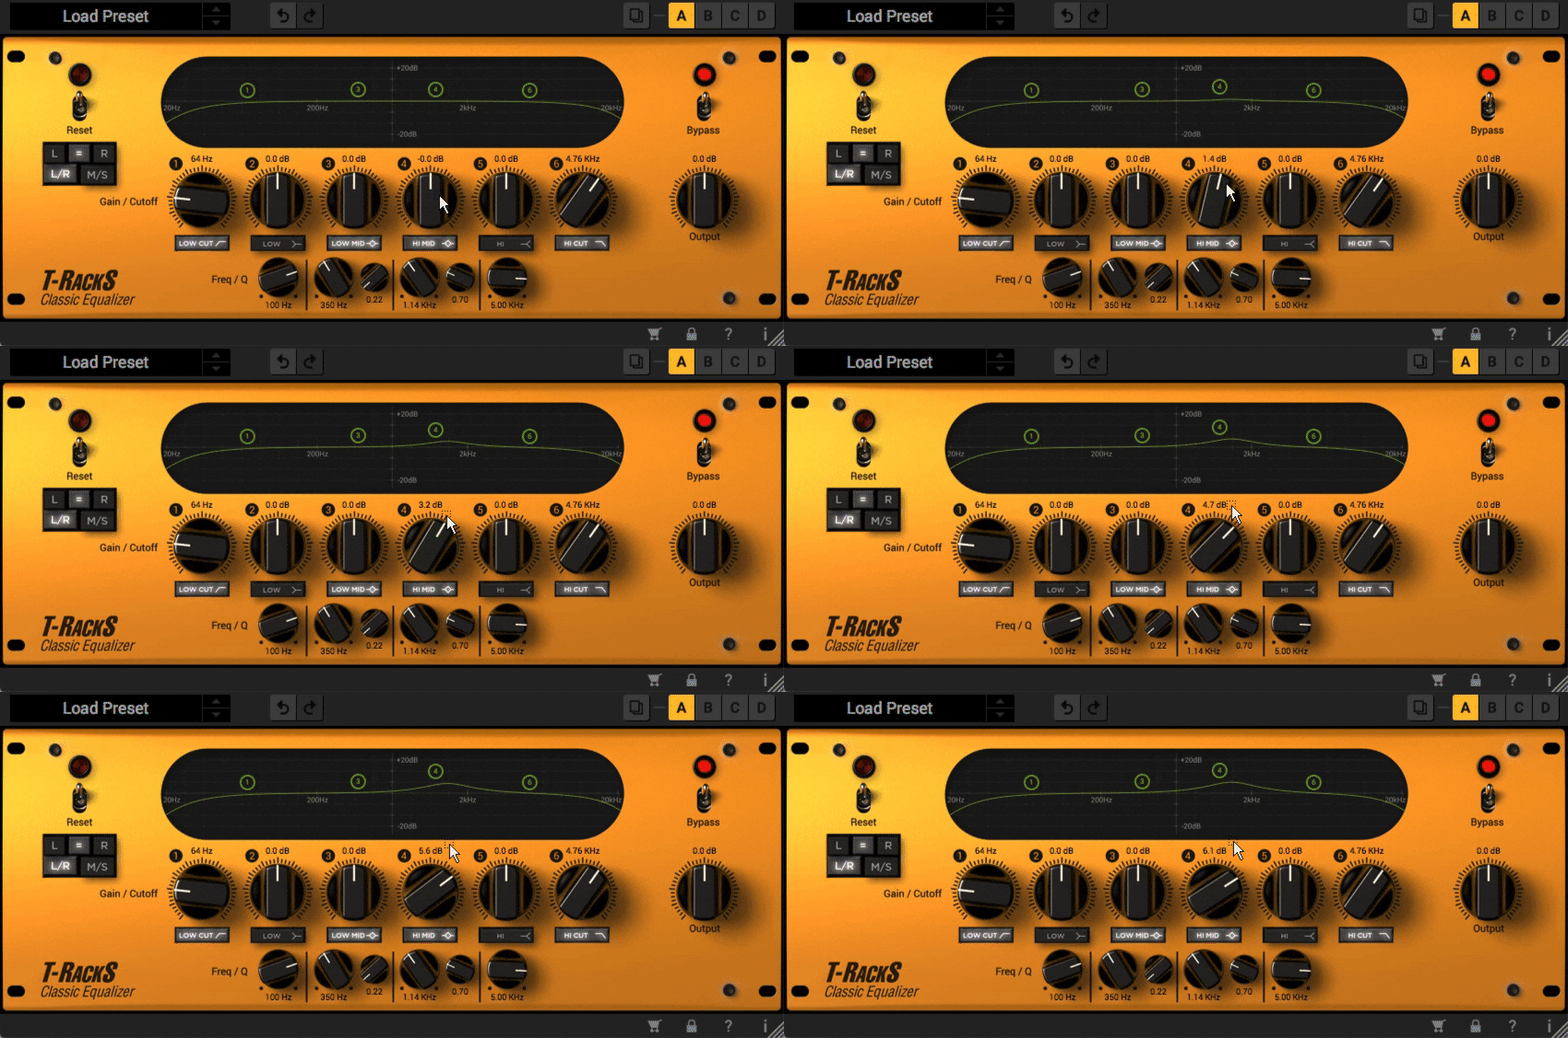
Raising the fader on the sound could work too, but then you’re raising the entire frequency spectrum vs the exact frequencies you need.
EQ is a really powerful tool, and this tends to be one of the areas where people get a little crazy and do more harm than good. Most people will tell you to do more cutting than boosting, and I agree with this for the most part. People will also tell you to never boost or cut more than 2 or 3 dB. That’s a piece of advice I don’t agree with.
It greatly depends on the sound you’re after, your source sounds/recordings, and what problems you’re encountering in the mix.
8. Avoid Ear Fatigue By Taking Breaks
While the mixing process can be fun as well as frustrating, it is important to take breaks; otherwise, you risk making poor mixing decisions based on the limitations of a fatigued ear.
The most powerful tool you have at your disposal is your ears. It doesn’t matter how much money you’ve dumped into your studio or how many fancy pieces of plugins and hardware you have. If you can’t accurately hear what’s going on, they’re useless.
Avoid mixing music at loud levels for long periods of time as you risk ear fatigue and damaging your ears. It’s okay to play the music loud for referencing purposes, but for long mixing sessions, choose a moderate level.
9. Reverb and Delay (Depth, Width, and Space)
In most cases, when you’re using quality instruments from Samplers and applications like
- Kontakt
- Nexus 3
- Reason Rack
- Omnisphere
- Serum
These sounds are already processed with effects and ready to go (most of the time). And while sound designers do a good job of designing sounds for us to use out of the box, they can’t compensate for how everyone will use their presets.
All plugins/fx can be overused and create a bad mix, but I find that Reverb and Delay are the easiest to overdue. Too much Reverb And Delay will result in a very cluttered and ridiculously messy mix.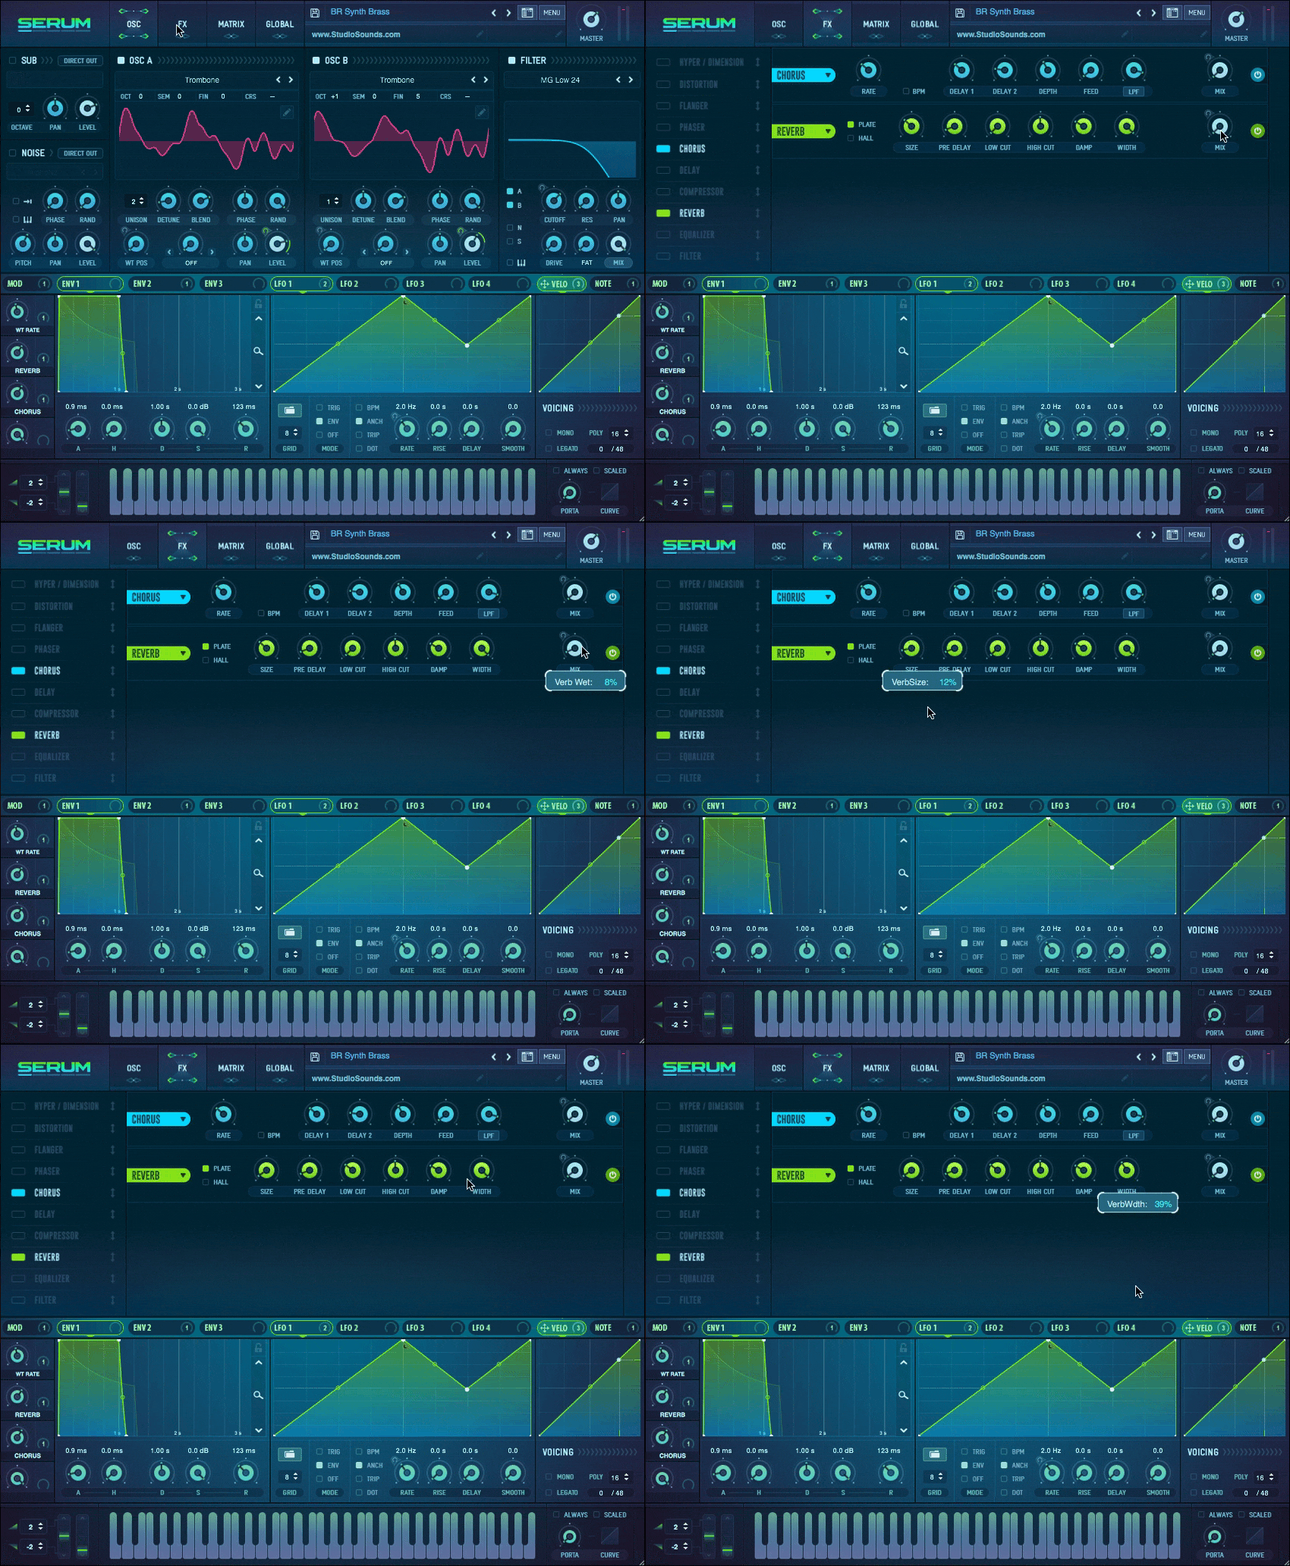
Reverb is good for making instruments bigger and giving them space. Think about how it sounds when bouncing a basketball in an empty gymnasium versus outside. With those sounds in mind, a secondary clap might sound good with a gymnasium-sounding Reverb, but every instrument would sound horrible using the same Reverb and intensity.
So what you want to do is play with the mix or wet/dry knob/slider on the reverb section of the patch to dial how much of the effect is on the sound. Also, play with the decay settings to control how long the tail is on the reverb.
The same needs to be done with Delay. You want to dial in how much delay is needed as well as how fast the delay happens (½, ¼, ⅛, etc).
Note some sounds, depending on your track, won’t need Reverb or Delay. Just because it’s, there doesn’t mean you have to use it as is or at all. So keep that in mind. Sometimes, I’ll kill the fx on the preset and add my own 3rd party fx on the sound. I’ll save that process for a more in-depth conversation.
What About Flanger, Echo, Chorus (Other Time Based Fx)?
I left these out purposely because they are all different types of Reverb and Delay, so the method for controlling/altering them is the same. Plus, I want to keep this post as simple as possible.
10. Grot Boxes & Checking Your Mix
After you’re done mixing, you’ll want to check the mix on multiple references/mediums. If you have multiple speakers, headphones, and other payback devices, you’ll want to check your mix in all of them if it’s possible. Smartphones are another good medium to check your music on, especially when checking your low-end frequencies.
Smartphones are generally incapable of generating subsonic information, this is your deep, deep low end which will translate well in clubs and on systems with subwoofers, but you also want to make sure that there are enough higher-end frequencies in the bass so it translates well on smaller on speakers.
One way to check is to use a software application like SpeakerSim (By NoiseAsh).
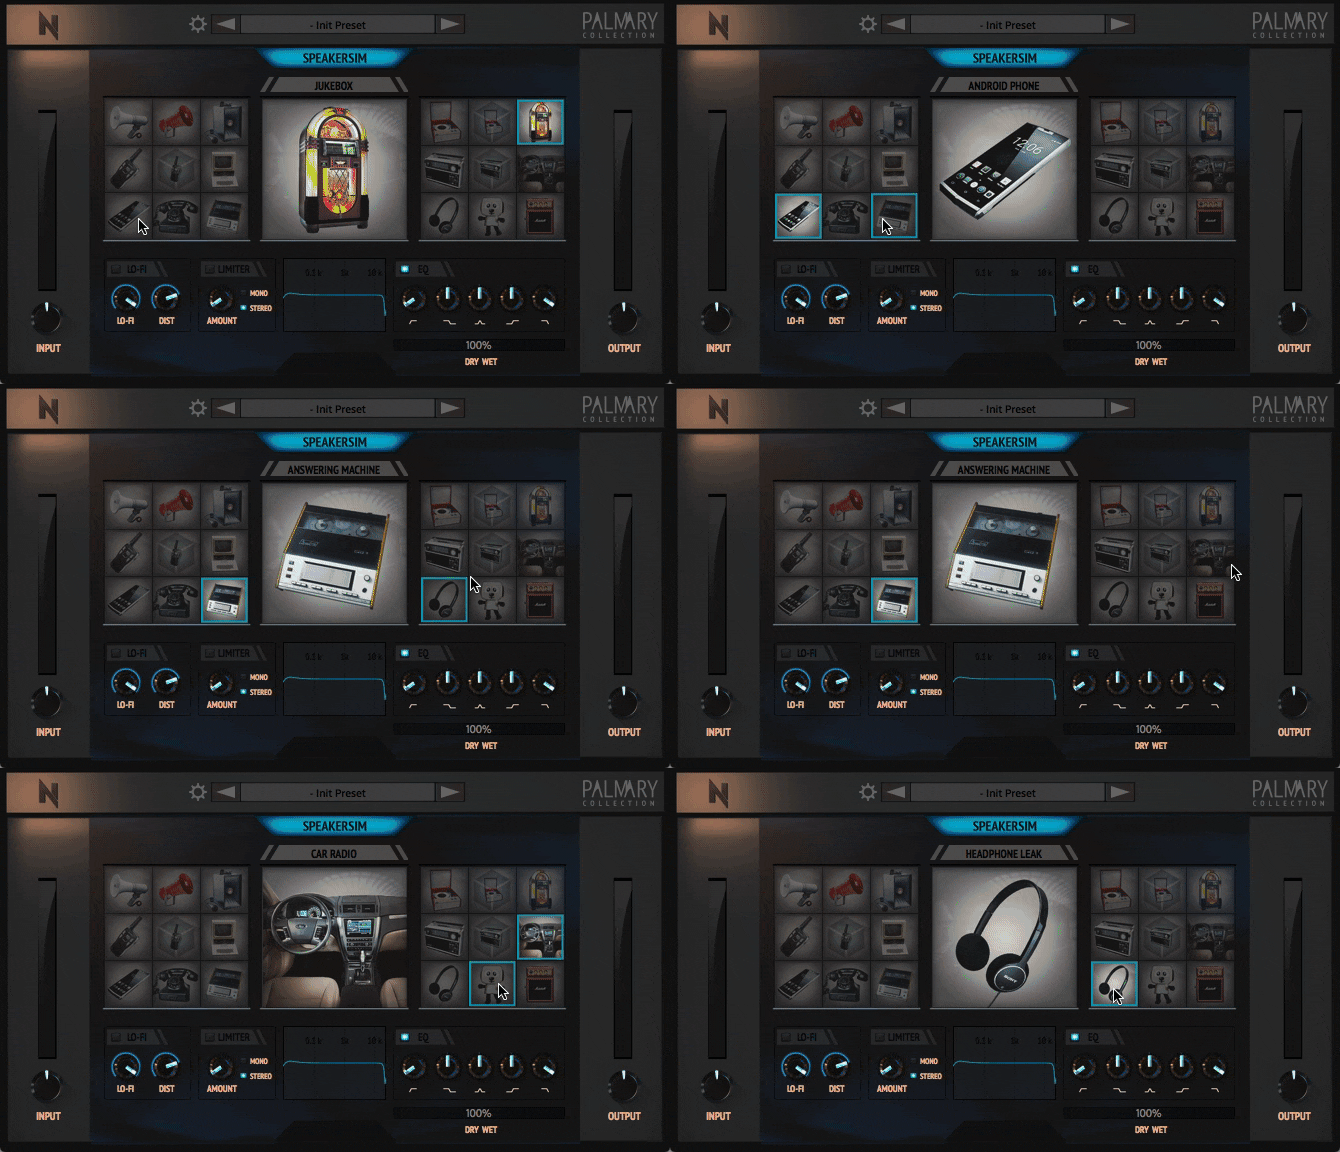
It would be great if every consumer could listen to music the way that we do (monitors), but that’s not the case. The majority of consumers listen to music on subpar speaker systems, and the way music is going now (it has been for a while), more people are using smartphones for music, video games, videography, etc.
So you definitely want to make your mix compatible with devices consumers use on a daily basis.
How To Get Better At Mixing Music
1. Study Good Reference Material
Choose 3-5 professionally mixed songs you like from your favorite genre and analyze them. As you analyze the songs, take note of the following: Stereo field, sound selection, song arrangement, tone/character, where the sounds sit in the mix, how loud the instruments are, and the overall level of the song.
Conduct A/B comparisons of your mix vs the professional mixed/mastered songs.
2. Learn From Mixing Engineers
Book time at a recording studio to have your mix critically analyzed and re-mixed by an experienced mixing engineer. The mixing engineer will not only be able to give you advice, but you can ask questions and see which mixing techniques are being used while your song is being mixed.
3. Mix Music With Volume Levels and EQ (Keep it Simple)
You can get the bulk of your mix done with stock high pass filters, low pass filters, and volume. EQs are essential for making space for instruments. Volume controls how loud each instrument is. The fewer tools you use, the more efficient you’ll become in dialing in your static mix.
4. Organize Your Mixing Session
Organize your mixing session so it’s easy to navigate. Name your sounds correctly. Place instruments such as drums/percussion, synths, piano, strings, brass, and bass elements in their own groups and buses. Use colors to make things visually appealing and easy to find.
5. Mix The Main Instruments First
Take the most important instruments and bring them to the front of the mix. Your most important instruments are sounds you want the listener to pay attention to most. After that, use the remaining instruments to build support around your main instruments.
6. Mix Music In Mono (Don’t Ignore this)
Mixing in mono will force you to blend elements together based on volume and EQ. If you can make your mix sound good in mono, it’s going to sound great once you strategically place instruments in the stereo field.
7. Mix A lot Of Music (Practice Mixing Music)
The more practice you have mixing music, the better you’ll become naturally. Acquire stems and recordings from friends, local musicians, bands, websites, and rap artists and offer to mix their music. There’s no way around putting in the time.
8. Use High-Quality VST Plugins
Good quality plug-ins make mixing a lot easier. There are a lot of free and paid plugins out there, and they both can sound good or bad, depending on the developer and what you’re after in terms of sound. Regardless of which route you take, free or paid, make sure the plugin sounds good.
Mixing Music Conclusion
Mixing shouldn’t be a daunting task, especially when it’s your music you’re mixing. It should be a fun, experimental learning experience. Keep in mind that no one gets good overnight. It takes time to find a workflow and a sound.
Thanks for sticking around (and reading). I hope this has been of some benefit to you. If it has, please pay it forward and share this post with others. If you have a mixing question, feel free to email me via my contact page.

